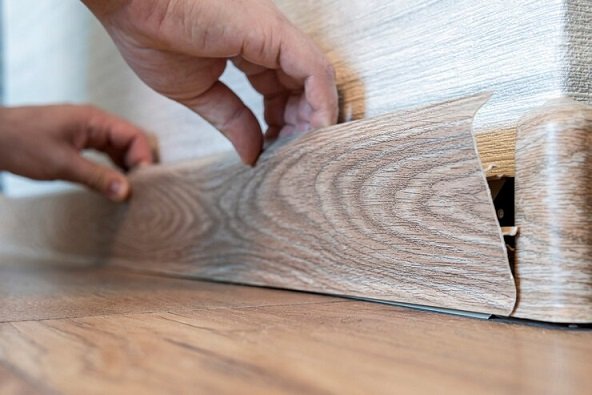
Luxury Vinyl Tile (LVT) flooring is a It is the most usual choice for the many homeowners because of its sturdiness, cheapness, and beautiful appearance. LVT is also not a perfect shield against damages. Scratches, scuffs, and dents can be the result of the high traffic of people which is mostly seen in the high traffic areas. Luckily, the repair of minor scratches and damages on LVT flooring can be easily done and it does not require the intervention of professionals. This article will tell you the steps to be taken so that your LVT flooring will be as new as possible.
Step 1: Get rid of the clutter around the problematic spot.
First of all, it is necessary to remove all the dirt and debris from the area before you start the repair. A soft broom or a vacuum cleaner is the best tool to use for this purpose. The stubborn dirt should be removed using a damp mop with a mild cleaner that has been designed for vinyl flooring. Do not use the scouring or scrubbing cleaners as they can aggravate the already damaged flooring.
Step 2: Examination of the problem is to be done to see the effect of the situation.
A thorough cleaning has to be done first, then you have to see the damage in detail. The approach to repair will depend on the severity and type of the damage:The approach to repair will depend on the severity and type of the damage:
Light scratches are usually removable or you can use a seam sealer to fill them.
The deeper scratches and gouges may need a vinyl repair kit or the new wooden floor or plates.
Step 3: Minor scratch fix is a feature that helps in locating the unclosed portions of the car, where a chip could be conceivably formed by other individuals.
Light scratches can be removed by using a vinyl seam sealer, which is a clear or similar-colored liquid that fills and seals the scratch. Use the applicator tip to dab a bit of the sealer on the scratch. Remove all the wrinkles and smoothen it and then with a clean cloth wipe off any excess. Follow the given instructions to dry the product.
Step 4: Deep Scratch and Gouge Repair is a project that has a scale size of more than 2 meters wide, made by a group of students working together in a team.
For the deep scratches and gouges you will need a vinyl patch kit. These kits generally come with a putty or a filler which can be colored to the flooring. Follow these steps:
Prepare the filler: Blend the elements according to the kit instructions. The color of your choice should be in harmony with the floor color which is as accurate as possible.
Fill the damaged area: Empower the putty knife to distribute the filler into the gouge or deep scratch. Make sure it is deeply embedded into the area to prove that it is well-fitted.
Level the surface: Take the filling and do the leveling with the putty knife, using it to make it flat with the surrounding flooring. Remove any excess filler.
Allow it to dry: Pay attention to the filler and let it dry fully. The time of drying can change, therefore, you should check the package’s instructions. Sand if necessary: If the surface is not smooth after drying, lightly sand it with fine-grit sandpaper until it merges with the rest of the floor.
Step 5: Finishing Touches
After the repair has been dried and cured, apply finishing coat if your repair kit includes one. Thus, it will either patch the damaged place or on the contrary, it will protect the place from being further damaged. If the finish of the surrounding area does not match the other parts of the room, you might think of applying a thin layer of vinyl floor finish to the whole room so that the room will look like the other parts are uniform.
Step 6: The implementation of measures that would prevent future damage is the Prime task that every nation would surely appreciate.
The establishment of measures against future damages is quite as significant as the solution of the current problems. Here are a few tips:Here are a few tips:
Put rubber or plastic pads under the legs of chairs, sofas and tables to avoid scratching the floor.
Keep pet nails trimmed.
Spread mats or rugs in areas where there is high traffic.
Keep and check the cleaning and maintenance of your flooring as often as the manufacturer suggests.
By following these steps, you can effectively repair scratches and damage on your LVT flooring, extending its life and maintaining its beauty. Remember, if the damage is extensive or if you’re unsure about the repair process, it’s wise to consult a professional.